How to Make a Toy Car to Real Car AI Video
Last updated:
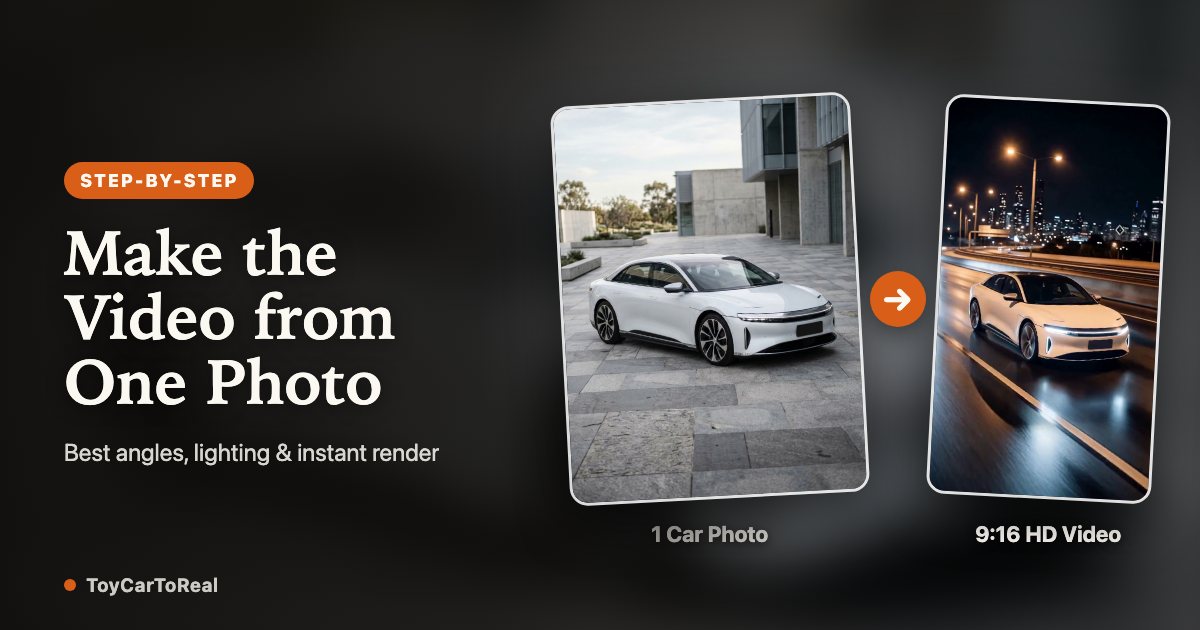
Start with a clear image of the car and a simple plan for the reveal. This guide follows the ToyCarToReal workflow from sign-in and upload to credits, review and download. Each generated result can differ, so inspect the full clip before sharing it. Processing time depends on the provider and queue.
1. Choose a photo you can use
Use your own photo or one you have permission to use for this purpose. Select a single complete car, photographed from the side or a three-quarter angle. Keep the roofline, bumpers and visible wheels inside the image. With a model car, lower the camera to roughly the car’s height so that the body proportions are easier to read.
Avoid photographs where another car or a person overlaps the subject. If you only have an old photograph, check that the scan shows enough detail before enlarging it. Increasing the file size cannot recover missing information. Remove private details from the source image before uploading it.
2. Prepare the file and upload it
The uploader accepts JPG, PNG and WebP files up to 10 MB. A phone photo saved in another format may need to be exported to one of these formats first. Use a normal image export rather than simply changing the file extension. Keep the colors natural and avoid filters that obscure panel edges.
Sign in with Google (existing verified email accounts can also sign in with their password), add the file and wait until the uploader says the photo is ready. Check the image preview to confirm that you chose the right file and that the full vehicle is visible.
3. Choose ~10s or ~15s in 480p or 768p HD
Choose between ~10 seconds and ~15 seconds across our three road scenes: Wet Night Expressway, Sunset Race Circuit, or Coastal Cliff Highway. A ~15-second sequence gives the camera extra time to linger on the miniature car before the tunnel and provides an extended highway cruise.
Credit tiers run from 9 credits (~10s 480p) to 18 credits (~15s 768p HD, our complete full-length tier). Review the displayed credit cost and your balance before submitting. Pack sizes and prices appear on the pricing page, and leftover pack credits never expire.
4. Confirm permission and submit once
Confirm that you can use the photo and that it does not contain people or private details you lack permission to share. Then start the job. The status changes from queued to processing while the work is in progress. Avoid repeatedly starting new jobs because the first one has not finished; a new submission is a separate request.
You can leave the page and return to My videos to check progress. If the job fails, the charged credits are returned automatically. Keep the job ID when asking for help. A successful status means that a video file was produced; it does not independently certify the visual quality or the accuracy of the car.
5. Inspect the car through the transition
Compare the first and last recognizable views of the vehicle. Check paint, roofline, wheel design and lights. Then watch the moment inside the tunnel. Look for a change of direction, duplicated wheels, distorted panels or a car that seems to pass through a solid surface. Review the moving clip, not only its thumbnail.
If the reference was dark or obstructed, try a cleaner photograph before making more attempts. Keep notes about the image you used and what changed. Each new submission is a separate generation and consumes the credits shown before you confirm; a visually imperfect successful video is different from a failed job.
6. Download and keep your own copy
Use Download MP4 in the result area or in My videos. Open the downloaded file to confirm that it plays and includes the full sequence. The configured format is 9:16; review the framing on the phone where the audience will watch it, especially if you plan to add a caption over the image.
Generated videos are kept for 30 days after they finish. Save your own copy before the expiry shown in your account. Uploaded photos are deleted automatically 7 days after upload. Deleting a file or closing your account can make it unavailable sooner. A browser bookmark is not a backup of the video itself.
7. Share the creative result accurately
Identify the clip as AI-generated and do not present it as a real road test, a recorded event or proof of a vehicle’s condition. The photo owner’s permission and the rights to any added music still matter. Check the destination platform’s options for AI labeling and audio before posting.
If you enable a public share link, anyone with that link can watch the video. You can stop sharing from your account. Avoid publishing a reference image that exposes a private plate, an address or someone else in the background. Describe your output as AI-generated and do not present the site's concept examples or reference trial as your own generation.
FAQ
How do I create a personalized car video?
Sign in with Google (or an existing verified email account), choose a car photo you may use and select your scene and duration (~10s or ~15s, from 9 credits in 480p to 18 credits in 768p HD). Availability depends on maintenance status and daily capacity.
How many credits does a video cost?
~10s 480p uses 9 credits; ~10s 768p HD uses 12 credits; ~15s 480p uses 12 credits; ~15s 768p HD uses 18 credits. Failed jobs return the credits used automatically.
Which car photo should I prepare?
Use a clear side or three-quarter view of a single complete car. Keep the wheels and roof in frame and remove private details.
Can I make this with a CapCut template or phone camera filter?
No. CapCut templates and phone filters work by cutting pre-recorded clips or applying color overlays. They cannot reconstruct a vehicle in 3D from one photo, navigate a tunnel transition, and render matching road motion. The toy car to real car effect requires generative AI video models that re-render the scene frame by frame.
Your Toy Car to Real Car moment is one photo away
Create my video